Tampilkan postingan dengan label Ubuntu. Tampilkan semua postingan

Getting LG L5 to be recognized by ADB on Ubuntu

I never had problem with my Samsung Galaxy W. I connected it to my Ubuntu, I issued adb install on the terminal, and everything went smoothly. Not a single problem.

Then I needed to upgrade to ICS. Samsung Galaxy wouldn't let me upgrade from Gingerbread to ICS. SO I bought LG L5 with ICS.

I connected LG L5 to my Ubuntu, issued adb install and....
adb spat this back to me:

error: insufficient permissions for device 

What went wrong???? I issued adb devices to list the Android devices latched to my Ubuntu. It gave me this:

List of devices attached 
????????????        no permissions 

So my LG is not recognized by Ubuntu. It turns out that you need to create udev file for every device that you are using. So you need to create this file as root: /etc/udev/rules.d/lg-android.rules

The file name is arbitrary, just as long as it ends with .rules extension. Use descriptive file name. In that directory I have lg-android.rules and htc-android.rules files. Add this line to the file:

SUBSYSTEM=="usb", ATTR{idVendor}=="1004", MODE="0777"

The number 0bb4 is manufacturer ID and must be replaced by the manufacturer ID of your device. List follows. And mode is the permission. I set it to 0777 just to make sure every body can execute, write to and read from the device.

Then save the file, and set its permission to be executable and readable by all.

sudo chmod a+rx /etc/udev/rules.d/70-android.rulessd

Then unplug the device, plug it again and issue adb devices again. If your device is not listed, wait a few minutes and issue adb devices again. Should be listed now. Otherwise, I don't know what's gone wrong. :p
One more thing, I need to set my LG L5 connectivity to Media sync (MTP) and enable USB debugging. MTP basically tells my device to act like USB thumb drive.

Following is the result of adb devices issued on my Ubuntu terminal after the above steps are conducted:


List of devices attached
LGOTMSe8ae1617 device


What baffles me is that, why does Samsung get recognized right away, and why does my LG L5 gets recognized automatically on Mac? All the above steps are absolutely unnecessary on Mac...

MANUFACTURERUSB VENDOR ID
Acer0502
Dell413c
Foxconn0489
Garmin-Asus091E
HTC (Older Phones)0bb4
HTC (Newer phones)18d1
Huawei12d1
Kyocera0482
LG1004
Motorola22b8
Nexus One/S18d1
Nvidia0955
Pantech10A9
Samsung04e8
Sharp04dd
Sony Ericsson0fce
ZTE19D2
Ref:
http://esausilva.com/2010/05/13/setting-up-adbusb-drivers-for-android-devices-in-linux-ubuntu/

Change the extension of all files in a directory

I had a slew of .cxx files inside my directory and I needed to change them to .cpp.

rename 's/.m4b$/.m4a/' *.m4b

Code snippet to calculate md5 in C/Ubuntu

First, sudo apt-get install libssl-dev
And then, compile it using the -lcrypto flag to link against /lib/i386-linux-gnu/libcrypto.so.1.0.0 

#include
#include
#include
#include

char *str2md5(const char *str, int length) {
    int n;
    MD5_CTX c;
    unsigned char digest[16];
    char *out = (char*)malloc(33);

    MD5_Init(&c);

    while (length > 0) {
        if (length > 512) {
            MD5_Update(&c, str, 512);
        } else {
            MD5_Update(&c, str, length);
        }
        length -= 512;
        str += 512;
    }

    MD5_Final(digest, &c);

    for (n = 0; n < 16; ++n) {
        snprintf(&(out[n*2]), 16*2, "%02x", (unsigned int)digest[n]);
    }

    return out;
}

int main(int argc, char **argv) {
  char *output = str2md5("hello", strlen("hello"));
  printf("%s\n", output);
  free(output);
  return 0;
}

Emacs

A recent project revived my interest in Emacs. I used it daily back then when I was in college and was pretty fluent in using it as editor for my C codes. Back then.

Now after years of not using it, my Emacs knowledge has become rusty. Looked up the web for tutorial and found a good one:

So basically I can also compile C codes from within Emacs. I can access shell from within Emacs. I just have to create a file called .emacs in my home directory as per the instruction in the above web page and fill it with following configurations:


(global-font-lock-mode t)
(global-set-key "\C-xs" 'save-buffer)
(global-set-key "\C-xv" 'quoted-insert)
(global-set-key "\C-xg" 'goto-line)
(global-set-key "\C-xf" 'search-forward)
(global-set-key "\C-xc" 'compile)
(global-set-key "\C-xt" 'text-mode);
(global-set-key "\C-xr" 'replace-string);
(global-set-key "\C-xa" 'repeat-complex-command);
(global-set-key "\C-xm" 'manual-entry);
(global-set-key "\C-xw" 'what-line);
(global-set-key "\C-x\C-u" 'shell);
(global-set-key "\C-x0" 'overwrite-mode);
(global-set-key "\C-x\C-r" 'toggle-read-only);
(global-set-key "\C-t" 'kill-word);
(global-set-key "\C-p" 'previous-line);
(global-set-key "\C-u" 'backward-word);
(global-set-key "\C-o" 'forward-word);
(global-set-key "\C-h" 'backward-delete-char-untabify);
(global-set-key "\C-x\C-m" 'not-modified);
(setq make-backup-files 'nil);
(setq default-major-mode 'text-mode)
(setq text-mode-hook 'turn-on-auto-fill)
(set-default-font "-misc-fixed-medium-r-normal--15-140-*-*-c-*-*-1")
(setq auto-mode-alist (cons '("\\.cxx$" . c++-mode) auto-mode-alist))
(setq auto-mode-alist (cons '("\\.hpp$" . c++-mode) auto-mode-alist))
(setq auto-mode-alist (cons '("\\.tex$" . latex-mode) auto-mode-alist))

;(require 'font-lock)
;(add-hook 'c-mode-hook 'turn-on-font-lock)
;(add-hook 'c++-mode-hook 'turn-on-font-lock)


The following is custom command to compile, run, and access terminal from within Emacs when the above config has been done:


Step Four - Compile the program and prepare the executable

  • Now, to compile your program just type make at the UNIX prompt.Alternatively (and this is recommended) if you have installed the appropriate .emacs file you can continue to do everything from inside emacs:
  • Use Ctrl-x b to switch back to hello_world.cpp.
  • Now press Ctrl-x c and hit enter to begin the compilation.
  • The screen will split into two windows (press Ctrl-x o to switch between them and Ctrl-x 1 to return to single window mode).
  • If there are any errors they should be listed in the compilation window. To correct them use Ctrl-x g to go to a particular line (alternatively advanced users might like to edit their .emacs file and map the emacs command next-error onto a key of their choice).

Step Five - run the executable program

  • To execute your program just type ./hello_world at the UNIX prompt.Alternatively, you can continue to work from inside emacs (with the recommended .emacs files):
  • If you are not in two window mode, press Ctrl-x 2.
  • If you are not in the lower of the two windows, press Ctrl-x o until you are.
  • Press Ctrl-x Ctrl-u to bring up a UNIX prompt inside the current emacs window.
  • Now type ./hello_world at the UNIX prompt. All the output from the program will be displayed in the emacs window.

Installing Linphone for Ubuntu

As is always the case with Linphone, there are many steps not written in the README that one needs do.

First get linphone:

git clone git://git.linphone.org/linphone.git --recursive


And then, do the following (I'm on Ubuntu. If your on other distros the lib name might be different!)


sudo apt-get install libgtk2.0-dev
sudo apt-get install intltool
sudo apt-get install libosip2-dev
sudo apt-get install libexosip2-dev
sudo apt-get install libspeex-dev
sudo apt-get install libspeexdsp-dev
sudo apt-get install ffmpeg
sudo apt-get install libavcodec-dev
sudo apt-get install libswscale-dev
sudo apt-get install libxv-dev
sudo apt-get install libv4l-dev

Lib name is case sensitive and differ from platform to platform. To know the exact lib name, you can go to http://pkgs.org/search and enter the common lib name (as is mentioned in the README) in the search field in the top right corner. The site will then list the exact library name for your distro and how to install it. Very convenient!

After all the above directories are installed, enter the directory where you git pulled linphone and do:

./autogen.sh
./configure
make
sudo make install

Last step, you need to have the shared dynamic library generated during linphone compilation into your path. I added the following line to my ~/.profile

export LD_LIBRARY_PATH=$LD_LIBRARY_PATH:/usr/local/lib

And then I restarted my machine to make the changes in profile takes permanent effect.

Now linphone is installed in /usr/local/bin and just type:

linphone

from terminal to execute it.

Ubuntu failed to connect to LAN

Someone screwed up with my computer LAN cabling at office, and now my Ubuntu could not connect to internet. It turned out to be such a headache to fix.
It was a headache. But should it happen again, it won't be, since now I know how to fix it.

Click on the internet connection icon on top right corner of the desktop. Edit a connection and choose to set it up manually. Fill in the IP, subnet mask and gateway.

And another important bit, set up the DNS. You can't set it up via that GUI interface in the preceding paragraph. Edit the file /etc/resolv.conf instead. On my Ubuntu 12, this file is a symlink to the /run/resolvconf/resolv.conf. The latter file is automatically generated by the resolvconf tool. So to manually edit DNS, you must first delete the symlink /etc/resolv.conf. And then, create a regular file at the same location, and enter in your DNS settings, such as below:

nameserver 192.168.0.11
nameserver 8.8.8.8

Restart the machine and you should be connected now.

Installing Java on Ubuntu

I still remember how *gruesome* it was to install or update Java on Ubuntu. I wrote it somewhere in earlier post. Fortunately now with Ubuntu 12.10, an easier method (a ready to execute script) is available:

First you need to remove openjdk for this run the following command from your terminal
sudo apt-get purge openjdk*
If you installed java 7 from any other PPA and you are having problem with java then you have to do following steps before installing the PPA menctioned here
sudo rm /var/lib/dpkg/info/oracle-java7-installer*
sudo apt-get purge oracle-java7-installer*
sudo rm /etc/apt/sources.list.d/*java*
sudo apt-get update
Install oracle java 7 in ubuntu 12.04
Open the terminal and run the following commands
sudo add-apt-repository ppa:webupd8team/java
sudo apt-get update
sudo apt-get install oracle-java7-installer

http://www.ubuntugeek.com/how-to-install-oracle-java-7-in-ubuntu-12-04.html

ADB not recognized on newly installed Ubuntu 12.10

I just installed latest Ubuntu (12.10) on my office computer running Win 7. Problems soon appear.

The first is that from time to time the desktop became totally unresponsive. Paralyzed. I had to wait for a few minutes until my mouse clicks did anything at all.
After looking at top, I found out that the process mount.ntfs occupied 100% of CPU. So I got windows partition mounted and Ubuntu was doing something to it that hogged the resources. I don't know how to solve this... I installed this Ubuntu from Windows initially.

And then I needed to put Eclipse to the Unity launcher. Unity launcher is a vertical container of icons on the left side of the desktop, as in following picture:

How: 
1. Create a file with .desktop extension, containing info like this:

[Desktop Entry]
Version=
Name=Eclipse
Comment=
Exec=/home/switchlab/Documents/bin/eclipse/eclipse
Icon=/home/switchlab/Documents/bin/eclipse/icon.xpm
Terminal=false
Type=Application
Categories=Application;

2. Put it in /usr/share/applications
3. In Dash Home, search for Eclipse and then drag and drop it to launcher.

I installed Android SDK, but then I failed to run adb eventhough I got it on my PATH. The error message said: No such file or directory. This is very weird. I checked that the adb did exist in platform-tools. So why this message? 

It turned out that this is caused by a glitch on my Ubuntu 64 bit installation. I had to do:
sudo dpkg --add-architecture i386 && sudo apt-get update && sudo apt-get install ia32-libs

and everything worked fine again. I still haven't got a clue what that command does. Anyway, thanks goes to Scotty Delicious who wrote it here: http://askubuntu.com/questions/219465/cannot-install-ia32-lib-package

Updating to JDK 7

So I updated my Ubuntu to 10.04.01 LTS and then updated my Java to version 7 release 1. Having been through traumatic update experience as I wrote in this blog post, I was rather reluctant at first to update to version 7. But I updated anyway. And surprise, surprise, it was not at all that complicated! It was almost magical. I did the following steps:
  1. I downloaded the JDK and extracted it into /usr/lib/jvm and renamed it to java-sun-1.7.0.1 to be compliant with the naming system of other Java versions.
  2. I changed the symlink java-6-sun to point to java-sun-1.7.0.1. (Previously it pointed to the directory java-sun-1.6.0.24).
  3. I edited the file .java-6-sun.jinfo. I changed only 2 lines in that file. I changed the first line, name=java-sun-1.7.0.1 (Previously it was name=java-sun-1.6.0.24). I also changed the priority number to 50. (The higher the priority number, the less prioritized it is).
  4. I did sudo update-java-alternatives -l and I saw that java-6-sun is listed.
  5. And then I called sudo update-java-alternatives -s java-6-sun. And it worked perfectly. No complaints at all. Well just one complaint: jdk alternative does not exist: /usr/lib/jvm/java-6-sun/bin/HtmlConverter. Well, I think that's not a problem.
  6. Done! I checked java -version and it did give me the correct version. I also opened Firefox and went to about:plugins, and the plugins were all at the correct version.
So, I guess.... that's it :)

Converting CHM file to html and pdf

From http://www.ubuntugeek.com/how-to-convert-chm-files-to-html-or-pdf-files.html


Microsoft Compiled HTML Help is a proprietary format for online help files, developed by Microsoft and first released in 1997 as a successor to the Microsoft WinHelp format. It was first introduced with the release of Windows 98, and is still supported and distributed through Windows XP platforms.
HTML Help files are made with help authoring tools. Microsoft ships the HTML Help Workshop with supported versions of Microsoft Windows and makes the tool available for free download. There are also a lot of third-party help authoring tools available.
CHM files, known as Microsoft Compressed HTML Help files, are a common format for eBooks and online documentation. They are basically a collection of HTML files stored in a compressed archive with the added benefit of an index.
Under Linux, you can view a CHM file with the xchm viewer. But sometimes that’s not enough. Suppose you want to edit, republish, or convert the CHM file into another format such as the Plucker eBook format for viewing on your Palm. To do so, you first need to extract the original HTML files from the CHM archive.
This can be done with the CHMLIB (CHM library) and its included helper application extract_chmLib.
Install Chmlib in Ubuntu
sudo apt-get install libchm-bin
Convert .chm files in to HTML files
If you want to convert .chm files in to HTML files use the following command
extract_chmLib book.chm outdir
where book.chm is the path to your CHM file and outdir is a new directory that will be created to contain the HTML extracted from the CHM file.
Convert .chm files in to PDF files
First you need to install htmldoc. HTML processor that generates indexed HTML, PS, and PDF.HTMLDOC is a program for writing documentation in HTML and producing indexed HTML, PostScript, or PDF output (with tables of contents). It supports most HTML 3.2 and some HTML 4.0 syntax, as well as GIF, JPEG, and PNG images.
sudo apt-get install htmldoc
If you want to use htmldoc type the following command in terminal
htmldoc

Enabling webDAV in Apache running on Ubuntu

I found the following tutorial on: http://www.howtoforge.com/how-to-set-up-webdav-with-apache2-on-ubuntu-8.10

How To Set Up WebDAV With Apache2 On Ubuntu 8.10
Version 1.0
Author: Falko Timme
Last edited 01/20/2009

This guide explains how to set up WebDAV with Apache2 on an Ubuntu 8.10 server. WebDAV stands for Web-based Distributed Authoring and Versioning and is a set of extensions to the HTTP protocol that allow users to directly edit files on the Apache server so that they do not need to be downloaded/uploaded via FTP. Of course, WebDAV can also be used to upload and download files.

I do not issue any guarantee that this will work for you!


1 Preliminary Note
I'm using an Ubuntu 8.10 server with the IP address 192.168.0.100 here.

Because we must run all the steps from this tutorial with root privileges, we can either prepend all commands in this tutorial with the string sudo, or we become root right now by typing

sudo su


2 Installing WebDAV
If Apache is not already installed, install it as follows:

apt-get install apache2

Afterwards, enable the WebDAV modules:

a2enmod dav_fs
a2enmod dav

Restart Apache:

/etc/init.d/apache2 restart


3 Creating A Virtual Host
I will now create a default Apache vhost in the directory /var/www/web1/web. For this purpose, I will modify the default Apache vhost configuration in /etc/apache2/sites-available/default. If you already have a vhost for which you'd like to enable WebDAV, you must adjust this tutorial to your situation.

First, we create the directory /var/www/web1/web and make the Apache user (www-data) the owner of that directory:

mkdir -p /var/www/web1/web
chown www-data /var/www/web1/web

Then we back up the default Apache vhost configuration (/etc/apache2/sites-available/default) and create our own one:

mv /etc/apache2/sites-available/default /etc/apache2/sites-available/default_orig
vi /etc/apache2/sites-available/default

NameVirtualHost *

ServerAdmin webmaster@localhost

DocumentRoot /var/www/web1/web/

Options Indexes MultiViews
AllowOverride None
Order allow,deny
allow from all


Then reload Apache:

/etc/init.d/apache2 reload


4 Configure The Virtual Host For WebDAV
Now we create the WebDAV password file /var/www/web1/passwd.dav with the user test (the -c switch creates the file if it does not exist):


htpasswd -c /var/www/web1/passwd.dav test

You will be asked to type in a password for the user test.

(Please don't use the -c switch if /var/www/web1/passwd.dav is already existing because this will recreate the file from scratch, meaning you lose all users in that file!)

Now we change the permissions of the /var/www/web1/passwd.dav file so that only root and the members of the www-data group can access it:

chown root:www-data /var/www/web1/passwd.dav
chmod 640 /var/www/web1/passwd.dav

Now we modify our vhost in /etc/apache2/sites-available/default and add the following lines to it:

vi /etc/apache2/sites-available/default

[...]
Alias /webdav /var/www/web1/web


DAV On
AuthType Basic
AuthName "webdav"
AuthUserFile /var/www/web1/passwd.dav
Require valid-user

[...]
The Alias directive makes (together with ) that when you call /webdav, WebDAV is invoked, but you can still access the whole document root of the vhost. All other URLs of that vhost are still "normal" HTTP.

The final vhost should look like this:

NameVirtualHost *

ServerAdmin webmaster@localhost

DocumentRoot /var/www/web1/web/

Options Indexes MultiViews
AllowOverride None
Order allow,deny
allow from all


Alias /webdav /var/www/web1/web


DAV On
AuthType Basic
AuthName "webdav"
AuthUserFile /var/www/web1/passwd.dav
Require valid-user


Reload Apache afterwards:

/etc/init.d/apache2 reload


5 Testing WebDAV
We will now install cadaver, a command-line WebDAV client:

apt-get install cadaver

To test if WebDAV works, type:

cadaver http://localhost/webdav/

You should be prompted for a user name. Type in test and then the password for the user test. If all goes well, you should be granted access which means WebDAV is working ok. Type quit to leave the WebDAV shell:

root@server1:~# cadaver http://localhost/webdav/
Authentication required for webdav on server `localhost':
Username: test
Password:
dav:/webdav/> quit
Connection to `localhost' closed.
root@server1:~#

Disabling annoying popup notification on Gnome Ubuntu

So I'm on Ubuntu and I use Pidgin and Tweetdeck. Everytime someone sends a chat message to me, or someone I follow tweets, a black notification message pops up on upper right corner of my screen, showing what who they are and what they say. And because I follow almost 500 people on Twitter, this notification pops up very frequently and becomes annoying distraction. I needed to rid them.

This is what I did, which worked for me:
sudo apt-get -y remove notification-daemon
sudo apt-get -y remove notify-osd pidgin-libnotify

Source: http://www.uluga.ubuntuforums.org/showthread.php?t=1360080

Enabling SSL on Ubuntu and the problem thereafter.

Recently I had to test our product on secured site, so I tried to install SSL on localhost. The config file for SSL site has been installed in /etc/apache2/sites-available. So I simply had to enable it and modify it. I first issued this to enable the SSL module:

sudo a2enmod ssl

And then I enabled the SSL config by:

sudo a2ensite default-ssl

After the above command is issued, a symlink to /etc/apache2/sites-available/default-ssl will be created and called /etc/apache2/sites-enabled/default-ssl. I edited it and uncommented the following lines:

SSLEngine on

SSLCertificateFile /home/ISA.REALOBJECTS/firman/Documents/ssl/linuxdev8.nc.crt
SSLCertificateKeyFile /home/ISA.REALOBJECTS/firman/Documents/ssl/linuxdev8.nc.key

The certificate (.crt file) and the key (.key file)  are snakeoil, so to say, I created them using OpenSSL. The commands I used to create them are the following:

openssl genrsa -des3 -out linuxdev8.nc.key 1024
openssl req -new -key linuxdev8.nc.key -x509 -out linuxdev8.nc.crt

After that, I restarted Apache, at which point I was asked to input the key phrase:

sudo /etc/init.d/apache2 restart

And lo and behold, I can now connect to http://127.0.0.1 and https://127.0.0.1

The problem happens after Ubuntu is restarted. Apache refuses to start, and throws up the following error message instead:

Starting httpd: (98)Address already in use: make_sock: could not bind to address 0.0.0.0:80
no listening sockets available, shutting down
Unable to open logs!

I googled for 3 days and tried all of the solutions I found, but my problem persisted. I have no clue what went wrong! I'm not a wizard when it comes to Apache directives but I guess there's something wrong somewhere in the config file. What I found to be a pseudo-solution was this:

Before restarting Ubuntu, disable the SSL site first by issuing this:

sudo a2dissite default-ssl

And then proceed to restarting Ubuntu. After computer is restarted, re-enable the SSL site and restart Apache:

sudo a2ensite default-ssl
sudo /etc/init.d/apache2 restart

That's it :)

BTW in case you wanna know my config files, the following are my /etc/apache2/ports.conf, /etc/apache2/sites-available/default, and /etc/apache2/sites-available/default-ssl, in that order:


NameVirtualHost *:80
Listen 80


    # SSL name based virtual hosts are not yet supported, therefore no
    # NameVirtualHost statement here
    Listen 443


ServerAdmin webmaster@localhost

DocumentRoot /var/www

Options FollowSymLinks
AllowOverride None


Options Indexes FollowSymLinks MultiViews
AllowOverride None
Order allow,deny
allow from all


ScriptAlias /cgi-bin/ /usr/lib/cgi-bin/

AllowOverride None
Options +ExecCGI -MultiViews +SymLinksIfOwnerMatch
Order allow,deny
Allow from all


ErrorLog /var/log/apache2/error.log

# Possible values include: debug, info, notice, warn, error, crit,
# alert, emerg.
LogLevel warn

CustomLog /var/log/apache2/access.log combined

    Alias /doc/ "/usr/share/doc/"
    
        Options Indexes MultiViews FollowSymLinks
        AllowOverride None
        Order deny,allow
        Deny from all
        Allow from 127.0.0.0/255.0.0.0 ::1/128


ServerAdmin webmaster@localhost

DocumentRoot /var/www

Options FollowSymLinks
AllowOverride None


Options Indexes FollowSymLinks MultiViews
AllowOverride None
Order allow,deny
allow from all


ScriptAlias /cgi-bin/ /usr/lib/cgi-bin/

AllowOverride None
Options +ExecCGI -MultiViews +SymLinksIfOwnerMatch
Order allow,deny
Allow from all


ErrorLog /var/log/apache2/error.log

# Possible values include: debug, info, notice, warn, error, crit,
# alert, emerg.
LogLevel warn

CustomLog /var/log/apache2/ssl_access.log combined

Alias /doc/ "/usr/share/doc/"

Options Indexes MultiViews FollowSymLinks
AllowOverride None
Order deny,allow
Deny from all
Allow from 127.0.0.0/255.0.0.0 ::1/128


#   SSL Engine Switch:
#   Enable/Disable SSL for this virtual host.
SSLEngine on

#   A self-signed (snakeoil) certificate can be created by installing
#   the ssl-cert package. See
#   /usr/share/doc/apache2.2-common/README.Debian.gz for more info.
#   If both key and certificate are stored in the same file, only the
#   SSLCertificateFile directive is needed.
SSLCertificateFile    /home/ISA.REALOBJECTS/firman/Documents/ssl/linuxdev8.isa.nc.crt
SSLCertificateKeyFile /home/ISA.REALOBJECTS/firman/Documents/ssl/linuxdev8.isa.nc.key

#   Server Certificate Chain:
#   Point SSLCertificateChainFile at a file containing the
#   concatenation of PEM encoded CA certificates which form the
#   certificate chain for the server certificate. Alternatively
#   the referenced file can be the same as SSLCertificateFile
#   when the CA certificates are directly appended to the server
#   certificate for convinience.
#SSLCertificateChainFile /etc/apache2/ssl.crt/server-ca.crt

#   Certificate Authority (CA):
#   Set the CA certificate verification path where to find CA
#   certificates for client authentication or alternatively one
#   huge file containing all of them (file must be PEM encoded)
#   Note: Inside SSLCACertificatePath you need hash symlinks
#         to point to the certificate files. Use the provided
#         Makefile to update the hash symlinks after changes.
#SSLCACertificatePath /etc/ssl/certs/
#SSLCACertificateFile /etc/apache2/ssl.crt/ca-bundle.crt

#   Certificate Revocation Lists (CRL):
#   Set the CA revocation path where to find CA CRLs for client
#   authentication or alternatively one huge file containing all
#   of them (file must be PEM encoded)
#   Note: Inside SSLCARevocationPath you need hash symlinks
#         to point to the certificate files. Use the provided
#         Makefile to update the hash symlinks after changes.
#SSLCARevocationPath /etc/apache2/ssl.crl/
#SSLCARevocationFile /etc/apache2/ssl.crl/ca-bundle.crl

#   Client Authentication (Type):
#   Client certificate verification type and depth.  Types are
#   none, optional, require and optional_no_ca.  Depth is a
#   number which specifies how deeply to verify the certificate
#   issuer chain before deciding the certificate is not valid.
#SSLVerifyClient require
#SSLVerifyDepth  10

#   Access Control:
#   With SSLRequire you can do per-directory access control based
#   on arbitrary complex boolean expressions containing server
#   variable checks and other lookup directives.  The syntax is a
#   mixture between C and Perl.  See the mod_ssl documentation
#   for more details.
#
#SSLRequire (    %{SSL_CIPHER} !~ m/^(EXP|NULL)/ \
#            and %{SSL_CLIENT_S_DN_O} eq "Snake Oil, Ltd." \
#            and %{SSL_CLIENT_S_DN_OU} in {"Staff", "CA", "Dev"} \
#            and %{TIME_WDAY} >= 1 and %{TIME_WDAY} <= 5 \
#            and %{TIME_HOUR} >= 8 and %{TIME_HOUR} <= 20       ) \
#           or %{REMOTE_ADDR} =~ m/^192\.76\.162\.[0-9]+$/
#

#   SSL Engine Options:
#   Set various options for the SSL engine.
#   o FakeBasicAuth:
#     Translate the client X.509 into a Basic Authorisation.  This means that
#     the standard Auth/DBMAuth methods can be used for access control.  The
#     user name is the `one line' version of the client's X.509 certificate.
#     Note that no password is obtained from the user. Every entry in the user
#     file needs this password: `xxj31ZMTZzkVA'.
#   o ExportCertData:
#     This exports two additional environment variables: SSL_CLIENT_CERT and
#     SSL_SERVER_CERT. These contain the PEM-encoded certificates of the
#     server (always existing) and the client (only existing when client
#     authentication is used). This can be used to import the certificates
#     into CGI scripts.
#   o StdEnvVars:
#     This exports the standard SSL/TLS related `SSL_*' environment variables.
#     Per default this exportation is switched off for performance reasons,
#     because the extraction step is an expensive operation and is usually
#     useless for serving static content. So one usually enables the
#     exportation for CGI and SSI requests only.
#   o StrictRequire:
#     This denies access when "SSLRequireSSL" or "SSLRequire" applied even
#     under a "Satisfy any" situation, i.e. when it applies access is denied
#     and no other module can change it.
#   o OptRenegotiate:
#     This enables optimized SSL connection renegotiation handling when SSL
#     directives are used in per-directory context.
#SSLOptions +FakeBasicAuth +ExportCertData +StrictRequire

SSLOptions +StdEnvVars


SSLOptions +StdEnvVars


#   SSL Protocol Adjustments:
#   The safe and default but still SSL/TLS standard compliant shutdown
#   approach is that mod_ssl sends the close notify alert but doesn't wait for
#   the close notify alert from client. When you need a different shutdown
#   approach you can use one of the following variables:
#   o ssl-unclean-shutdown:
#     This forces an unclean shutdown when the connection is closed, i.e. no
#     SSL close notify alert is send or allowed to received.  This violates
#     the SSL/TLS standard but is needed for some brain-dead browsers. Use
#     this when you receive I/O errors because of the standard approach where
#     mod_ssl sends the close notify alert.
#   o ssl-accurate-shutdown:
#     This forces an accurate shutdown when the connection is closed, i.e. a
#     SSL close notify alert is send and mod_ssl waits for the close notify
#     alert of the client. This is 100% SSL/TLS standard compliant, but in
#     practice often causes hanging connections with brain-dead browsers. Use
#     this only for browsers where you know that their SSL implementation
#     works correctly.
#   Notice: Most problems of broken clients are also related to the HTTP
#   keep-alive facility, so you usually additionally want to disable
#   keep-alive for those clients, too. Use variable "nokeepalive" for this.
#   Similarly, one has to force some clients to use HTTP/1.0 to workaround
#   their broken HTTP/1.1 implementation. Use variables "downgrade-1.0" and
#   "force-response-1.0" for this.
BrowserMatch ".*MSIE.*" \
nokeepalive ssl-unclean-shutdown \
downgrade-1.0 force-response-1.0

Ubuntu stucks at "Starting Winbind daemon"

My Ubuntu hanged. I restarted it. But it got stuck at  "Starting Winbind daemon" point. I restarted it again. It stuck there again. I randomly pressed keys, and what got it moving was the classics Ctrl+Alt+Del. It did not restart Ubuntu. On the contrary, it helped Ubuntu pass the "Starting Winbind daemon" point and proceed normally into the login prompt. By the way, I'm using the Jaunty Jackalope.

Updating to JDK release 20

OK, after manually updating my JDK three times, which is painstaking on my Jaunty Jackalope machine, I finally got the hang of how to do it. Or at least so I thought. So, basically, the steps are as follow:
  1. Download the JDK bin installer from Sun's (or now, Oracle's) site.
  2. Put it in /usr/lib/jvm and execute it, which basically will unzip it.
  3. Rename the resulting directory to follow the naming patterns of other directories of JDK of other versions.
  4. Create the .jinfo file. Just copy paste the .jinfo from other version, change the directory, change the name, and change the priority number. Newer version should be assigned less priority number. (The more the priority number is, the less prioritized it is).
  5. Call update-java-alternatives -l and see if your newly installed java is listed. If so, then call update-java-alternatives -s , and then see that you don't get "Can not update" message. If you do, and that was what happened to me, solution in the end of this post.
  6. Locate all java plugins for Mozilla and delete them all, save the ones under /usr/lib/jvm. Not surprisingly, there is a linux command called "locate" to do that. But funnily, it is only yesterday that I found out about it. So basically you would want to call this command (without the quotes): "locate libnpjp2.so libjavaplugin_oji.so pluginreg.dat", and then note the directory names because you are going to need them later, and then delete all of them but not the ones under /usr/lib/jvm.
  7. Go to mozilla plugin directories (the ones you took note in step 6) and re-create the symlink to java plugin which is located in /lib/i386/libnpjp2.so. This is the command that you need (again, without the quotes): "ln -s /lib/i386/libnpjp2.so . " Remember to do this for each plugin that you deleted in step 6. That is, for each libnpjp2.so and libjavaplugin_oji.so file. And then check that you firefox has updated its plugin by doing step 8.
  8. Re-start firefox and then in the address bar type: "about:plugins". (Without the quotes). Scroll and see that you have the Java (TM) plugin of the correct version.
If you did all the above steps and still something went awry, well... tinker, google, may God help you. Oh yeah, sometimes running update-java-alternatives gives you a horror message of "can not update...". It turned out that simply making .jinfo file sometimes does not update the information or... something to that effect. I do not really understand how this update mechanism works. But fortunately, someone from Ubuntu forum made a nifty shell script to execute to before calling update-java-alternatives and the script really saved my day. The following is the script:

#!/bin/sh
update-alternatives --install /usr/bin/ControlPanel ControlPanel /usr/lib/jvm/java-6-sun-1.6.0.20/jre/bin/ControlPanel 60
update-alternatives --install /usr/bin/java java /usr/lib/jvm/java-6-sun-1.6.0.20/jre/bin/java 60
update-alternatives --install /usr/bin/java_vm  java_vm /usr/lib/jvm/java-6-sun-1.6.0.20/jre/bin/java_vm 60
update-alternatives --install /usr/bin/javaws  javaws /usr/lib/jvm/java-6-sun-1.6.0.20/jre/bin/javaws 60
update-alternatives --install /usr/bin/jcontrol  jcontrol /usr/lib/jvm/java-6-sun-1.6.0.20/jre/bin/jcontrol 60
update-alternatives --install /usr/bin/keytool  keytool /usr/lib/jvm/java-6-sun-1.6.0.20/jre/bin/keytool 60
update-alternatives --install /usr/bin/pack200  pack200 /usr/lib/jvm/java-6-sun-1.6.0.20/jre/bin/pack200 60
update-alternatives --install /usr/bin/policytool  policytool /usr/lib/jvm/java-6-sun-1.6.0.20/jre/bin/policytool 60
update-alternatives --install /usr/bin/rmid  rmid /usr/lib/jvm/java-6-sun-1.6.0.20/jre/bin/rmid 60
update-alternatives --install /usr/bin/rmiregistry  rmiregistry /usr/lib/jvm/java-6-sun-1.6.0.20/jre/bin/rmiregistry 60
update-alternatives --install /usr/bin/unpack200  unpack200 /usr/lib/jvm/java-6-sun-1.6.0.20/jre/bin/unpack200 60
update-alternatives --install /usr/bin/orbd  orbd /usr/lib/jvm/java-6-sun-1.6.0.20/jre/bin/orbd 60
update-alternatives --install /usr/bin/servertool  servertool /usr/lib/jvm/java-6-sun-1.6.0.20/jre/bin/servertool 60
update-alternatives --install /usr/bin/tnameserv  tnameserv /usr/lib/jvm/java-6-sun-1.6.0.20/jre/bin/tnameserv 60
update-alternatives --install /usr/bin/HtmlConverter  HtmlConverter /usr/lib/jvm/java-6-sun-1.6.0.20/bin/HtmlConverter 60
update-alternatives --install /usr/bin/appletviewer  appletviewer /usr/lib/jvm/java-6-sun-1.6.0.20/bin/appletviewer 60
update-alternatives --install /usr/bin/apt  apt /usr/lib/jvm/java-6-sun-1.6.0.20/bin/apt 60
update-alternatives --install /usr/bin/extcheck  extcheck /usr/lib/jvm/java-6-sun-1.6.0.20/bin/extcheck 60
update-alternatives --install /usr/bin/idlj  idlj /usr/lib/jvm/java-6-sun-1.6.0.20/bin/idlj 60
update-alternatives --install /usr/bin/jar  jar /usr/lib/jvm/java-6-sun-1.6.0.20/bin/jar 60
update-alternatives --install /usr/bin/jarsigner  jarsigner /usr/lib/jvm/java-6-sun-1.6.0.20/bin/jarsigner 60
update-alternatives --install /usr/bin/java-rmi.cgi  java-rmi.cgi /usr/lib/jvm/java-6-sun-1.6.0.20/bin/java-rmi.cgi 60
update-alternatives --install /usr/bin/javac  javac /usr/lib/jvm/java-6-sun-1.6.0.20/bin/javac 60
update-alternatives --install /usr/bin/javadoc  javadoc /usr/lib/jvm/java-6-sun-1.6.0.20/bin/javadoc 60
update-alternatives --install /usr/bin/javah  javah /usr/lib/jvm/java-6-sun-1.6.0.20/bin/javah 60
update-alternatives --install /usr/bin/javap  javap /usr/lib/jvm/java-6-sun-1.6.0.20/bin/javap 60
update-alternatives --install /usr/bin/jconsole  jconsole /usr/lib/jvm/java-6-sun-1.6.0.20/bin/jconsole 60
update-alternatives --install /usr/bin/jdb  jdb /usr/lib/jvm/java-6-sun-1.6.0.20/bin/jdb 60
update-alternatives --install /usr/bin/jhat  jhat /usr/lib/jvm/java-6-sun-1.6.0.20/bin/jhat 60
update-alternatives --install /usr/bin/jinfo  jinfo /usr/lib/jvm/java-6-sun-1.6.0.20/bin/jinfo 60
update-alternatives --install /usr/bin/jmap  jmap /usr/lib/jvm/java-6-sun-1.6.0.20/bin/jmap 60
update-alternatives --install /usr/bin/jps  jps /usr/lib/jvm/java-6-sun-1.6.0.20/bin/jps 60
update-alternatives --install /usr/bin/jrunscript  jrunscript /usr/lib/jvm/java-6-sun-1.6.0.20/bin/jrunscript 60
update-alternatives --install /usr/bin/jsadebugd  jsadebugd /usr/lib/jvm/java-6-sun-1.6.0.20/bin/jsadebugd 60
update-alternatives --install /usr/bin/jstack  jstack /usr/lib/jvm/java-6-sun-1.6.0.20/bin/jstack 60
update-alternatives --install /usr/bin/jstat  jstat /usr/lib/jvm/java-6-sun-1.6.0.20/bin/jstat 60
update-alternatives --install /usr/bin/jstatd  jstatd /usr/lib/jvm/java-6-sun-1.6.0.20/bin/jstatd 60
update-alternatives --install /usr/bin/native2ascii  native2ascii /usr/lib/jvm/java-6-sun-1.6.0.20/bin/native2ascii 60
update-alternatives --install /usr/bin/rmic  rmic /usr/lib/jvm/java-6-sun-1.6.0.20/bin/rmic 60
update-alternatives --install /usr/bin/schemagen  schemagen /usr/lib/jvm/java-6-sun-1.6.0.20/bin/schemagen 60
update-alternatives --install /usr/bin/serialver  serialver /usr/lib/jvm/java-6-sun-1.6.0.20/bin/serialver 60
update-alternatives --install /usr/bin/wsgen  wsgen /usr/lib/jvm/java-6-sun-1.6.0.20/bin/wsgen 60
update-alternatives --install /usr/bin/wsimport  wsimport /usr/lib/jvm/java-6-sun-1.6.0.20/bin/wsimport 60
update-alternatives --install /usr/bin/xjc  xjc /usr/lib/jvm/java-6-sun-1.6.0.20/bin/xjc 60
update-alternatives --install /usr/bin/jexec  jexec /usr/lib/jvm/java-6-sun-1.6.0.20/jre/lib/jexec 60
update-alternatives --install /usr/lib/mozilla-firefox/plugins/libnpjp2.so libnpjp2.so /usr/lib/jvm/java-6-sun-1.6.0.20/jre/lib/i386/libnpjp2.so 60

Update Feb 20, 2011:
So just now I tried to update it again to JDK 6 update 24. I followed the above procedure, but my Firefox plugins still won't update. I did the following:

  1. I deleted the Java plugin symlinks in mozilla firefox home directory and replace them with the new ones pointing to Java 6 u 24.
  2. I deleted the Java plugin symlinks in mozilla firefox home directory and DIDN'T REPLACE THEM.
I tried the above 2, and the Java plugins for Firefox still point to update 22. Even after I deleted them and did not replace them. So it seems to me that those symlinks do not server any purpose whatsoever on my system. I then returned to /usr/lib/jvm and did ls -al. There I noticed a symlink java-6-sun which pointed to java-6-sun-1.6.0.22. I then changed it to point to java-6-sun-1.6.0.24. And voila! Firefox plugins are now pointing to update 24! And I haven't added symlinks pointing to Java plugins in mozilla firefox home directory! So I guess the revised procedure to update Java is as follow:

  1. Do steps 1, 2, 3, 4 above.
  2. Run the above update-alternatives script.
  3. Do step 5 above.
  4. Change the symlink java-6-sun to point to the new updated Java directory.
That works for me, even though I don't quite understand what happens behind the scene.


Well, that's all for now folks :) References:
http://java.sun.com/javase/6/webnotes/install/jre/manual-plugin-install-linux.html
http://ubuntuforums.org/showthread.php?t=571257
http://mrinvader.blogspot.com/2010/05/stupid-effing-java.html

Litany of errors strike after manually updating


So, after I manually updated the JDK to release 19, as I wrote in this post, a series of errors strike me. First, I was unable to run my applet. It threw ExceptionInInitializer error. Then I had to revert to using JRE 16, as I wrote in this post. OK, running applet was resolved. But then, another error occurred. This time it happened when I built my project in Eclipse. I encountered KeyStoreException error when I tried to sign my applet. I then remember that I was still using the JRE 19 vm when invoking the Eclipse. OK, so I changed the run.sh of Eclipse to use JRE 16. I still could not sign my applet. So what went wrong? It turned out that I did not have JDK to go with JRE 19... or... something to that effect. So I looked around and stumbled upon this site, explaining how to update your JDK and JRE. This is a very simple process, compared to when I did it manually.

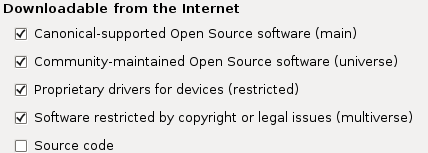
To install proprietary Java, you must have the Multiverse repository enabled. Click on System > Administration > Software Source > Select Multisource > Close


Open a shell prompt (terminal) and type the following to install JDK and JRE:
$ sudo apt-get install sun-java6-bin sun-java6-jre sun-java6-jdk
Setup the default Java version

Ubuntu Linux comes with update-java-alternatives utility to updates all alternatives belonging to one runtime or development kit for the Java language. To select, Sun's JVM as provided in Ubuntu 7.10, enter:
$ sudo update-java-alternatives -s java-6-sun
You also need to edit a file called /etc/jvm. This file defines the default system JVM search order. Each JVM should list their JAVA_HOME compatible directory in this file. The default system JVM is the first one available from top to bottom. Open /etc/jvm
$ sudo vi /etc/jvm
Make sure /usr/lib/jvm/java-6-sun is added to the top of JVM list
/usr/lib/jvm/java-6-sun
At the end your file should read as follows:
/usr/lib/jvm/java-6-sun
/usr/lib/jvm/java-gcj
/usr/lib/jvm/ia32-java-1.5.0-sun
/usr/lib/jvm/java-1.5.0-sun
/usr
Save and close the file.
Setup the environment variable

You also need to setup JAVA_HOME and PATH variable. Open your $HOME/.bash_profile or /etc/profile (system wide) configuration. Open your .bash_profile file:
$ vi $HOME/.bash_profile
Append following line:
export JAVA_HOME=/usr/lib/jvm/java-6-sun
export PATH=$PATH:$JAVA_HOME/bin
Save and close the file.
Test your new JDK

Type the following command to display version:
$ java -version
Output:

java version "1.6.0_03"
Java(TM) SE Runtime Environment (build 1.6.0_03-b05)
Java HotSpot(TM) Server VM (build 1.6.0_03-b05, mixed mode)

Try HelloWorld.java - first java program

$ vi HelloWorld.java
Append code:

public class HelloWorld {
    public static void main(String[] args) {
        System.out.println("Hello, World!");
    }
}

Save and close the file. Compile HelloWorld.java and execute program by typing following two instructions:
$ javac HelloWorld.java
$ java HelloWorld

Output:

Hello, World!

java.lang.ExceptionInInitializerError after manually updating Java

OK, after I did the manual updating as was explained in the last post, I was unable to run my applet. The Java Console throws java.lang.ExceptionInInitializerError error. I did not know what went wrong.
After googling, I arrived at the following information.
#
Run sudo update-java-alternatives -l to see the current configuration and possibilities.
#
Run sudo update-java-alternatives -s XXXX to set the XXX java version as default. For Sun Java 6 this would be sudo update-java-alternatives -s java-6-sun
#
Run java -version to ensure that the correct version is being called.
I ran the command, and the following was the result on my console:
java-6.19-sun 60 /usr/lib/jvm/java-6.19-sun
java-6-sun 63 /usr/lib/jvm/java-6-sun
java-gcj 1042 /usr/lib/jvm/java-gcj
java -version shows:
Java(TM) SE Runtime Environment (build 1.6.0_19-b04)
Java HotSpot(TM) Server VM (build 16.2-b04, mixed mode)

So, my manual installation works. But why does running applets throw the above error? So I decided to revert to java-6-sun. And the exception does not show again. What went wrong?

Updating Sun JDK in Ubuntu

I recently had to update my JRE to the latest 6 update 19 to replicate a security warning dialog. I found the tutorial here. I will copy it here just in case something happens to that blog and this info that I surely will need again later disappears (Og, God forbids!)

Start by downloading the JDK for your architecture from SUN. Take the .bin file, extract it by running it as a shell script:

sh jdk-6u19-linux-i586.bin

This will create a new folder called /jdk1.6.0_19. Rename this to java-6-sun-1.6.0.19 (just to remain consistent with how Debian/Ubuntu refers to JDK's) and move this folder to /usr/lib/jvm:
 
sudo mv jdk1.6.0_19 java-6-sun-1.6.0.19
sudo mv jdk1.6.0_19/ /usr/lib/jvm

Officially you are suppose to use the update-java-alternatives command when using a Debian distro, but frankly I find it easier to do this manually. We need to update the /usr/lib/jvm/.java-6-sun.jinfo, so type:

sudo gedit .java-6-sun.jinfo

This will open up a hidden configuration file. The first line likely shows:
 
name=java-6-sun-1.6.0.06
...
Simply change this to point to the new version:
 
name=java-6-sun-1.6.0.10
...
Also, update the java 6 symlink to point to the one we just installed:
sudo rm /usr/lib/jvm/java-6-sun
sudo ln -s /usr/lib/jvm/java-6-sun-1.6.0.10/ /usr/lib/jvm/java-6-sun

If anything goes wrong after the above steps are taken, proceed to the following. But only if anything screws up. (Taken from here).

  • Open a Terminal window
  • Run sudo update-java-alternatives -l to see the current configuration and possibilities.
  • Run sudo update-java-alternatives -s XXXX to set the XXX java version as default. For Sun Java 6 this would be sudo update-java-alternatives -s java-6-sun
  • Run java -version to ensure that the correct version is being called.
You can also use the following command to interactively make the change;
  • Open a Terminal window
  • Run sudo update-alternatives --config java
  • Follow the onscreen prompt